I see that the docs say the Gen 3 flow meter is to be mounted above ground. My entire system, including backflow preventer, is below ground. The backflow preventer is in a large covered ground box. Any way to work with this? Otherwise, probably no reason to upgrade.
2 Likes
Simply do a small ground box 
I’m glad the flow meter was brought up. Thanks @Watermiser. I have some questions too. Retrofits with in ground devices will be a challenge.
Here are my questions:
Now the installation specs say the sensor only needs 6" (vs. before which was 18") of pipe after the backflow device. Around here in the south, most new systems are in ground and have a master valve within 6" of the backflow device.
-Can the sensor be installed after a master valve?
-Is there a minimum distance after the sensor to the first turn?
It’s recommended to install the sensor above ground. Around here they would be underground, and more than likely get covered with dirt.
-Have these sensors been tested long enough in the ground while weathering two seasons?
-Does installing them in the ground void the warranty?
What if a zone valve fails to open due to a diaphragm issue or cut common wire.
-Will the sensor send a no-flow notification alert?
5 Likes
Mine is entirely below ground too. I’m loathe to do anything below ground. In fact, I rue the day when I have a completely failed and unfixable valve. What a pain to replace – hopefully I can do it without disconnecting anything beyond what I can remove using a screw driver.
So that said, I just bought the 2nd gen Rachio and am in no hurry whatsoever to get a 3rd gen. Now if we could ever measure water flow like we can with electrons using a clamp on a PVC pipe… that’d be something.
Would it be an idea to move this/and others topics to FLOW category?
Looks like it has been moved.
I wish Rachio support would jump in here to discuss whether the flow meter can be put in a ground box. So far they are silent.
1 Like
The installation video mentions a web page at www.rachio.com/underground for information on underground installation, but that gives a 404 page not found error. When I searched for “underground” there is a page but it says it’s in work. Support needs to please complete the installation information since they are shipping the flow meter.
Yikes! Thanks for pointing this out, we’ll get that fixed ASAP.
We plan to have the underground instructions published by this upcoming weekend.
Drafts of the underground flow meter installation guide are published! Please review and comment with any questions.
2 Likes
The Rachio underground Flow Meter valve video is now working: https://docs.google.com/document/d/1oskhGiMGNeD07isiGUL8qkTIOC3inOKhXUP-SOHJWyg/edit#
1 Like
I’ve got a $25 swag coupon to the first flow meter underground install pictures!

1 Like
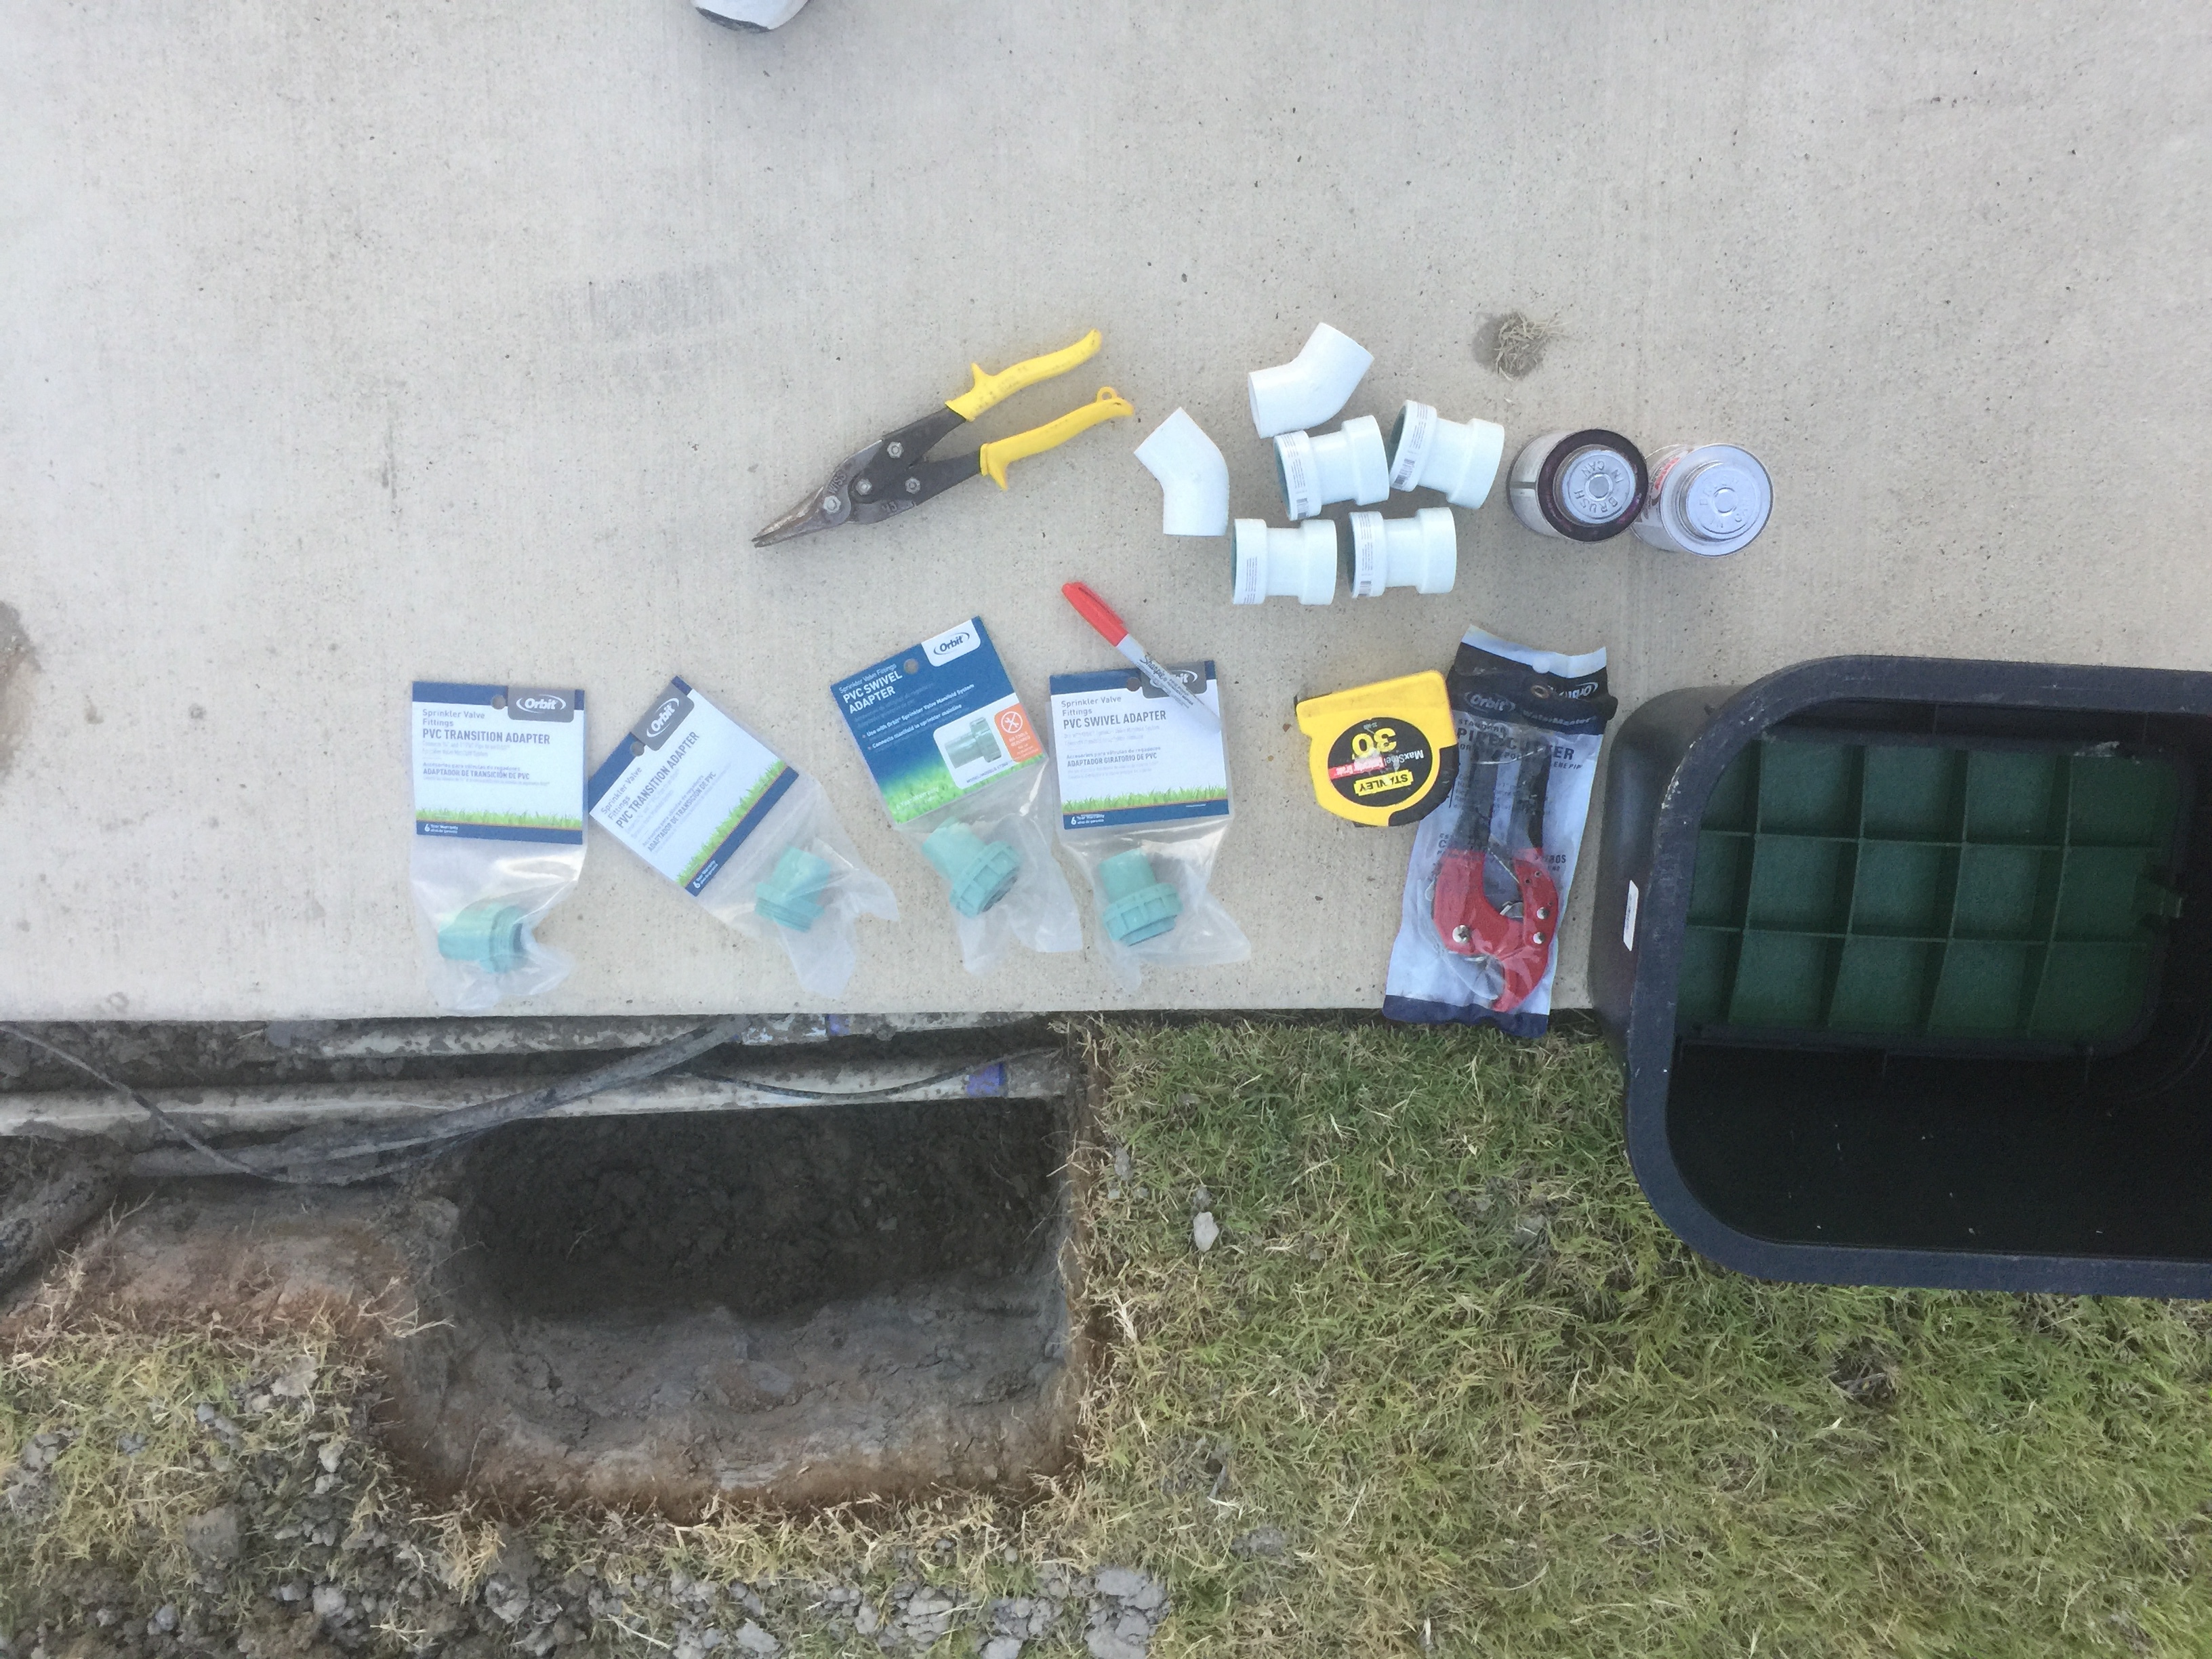
Still working on my underground install because one of the components required (Orbit #57191 PVC Transition Adapters) is not available at my local Home Depot. I recommend ordering from Amazon once you have confirmed the pipe type and size unless you can confirm your local store has them. I also checked Home Depot online and Lowes online with no success for this item. I have 1 inch PVC pipes in my system.
1 Like
As soon as the last part shows up I will post pictures… 

1 Like
Done!
First a picture of the shutoff valve to backflow to main valve progression with the digging at the top, water source from the bottom of the picture:

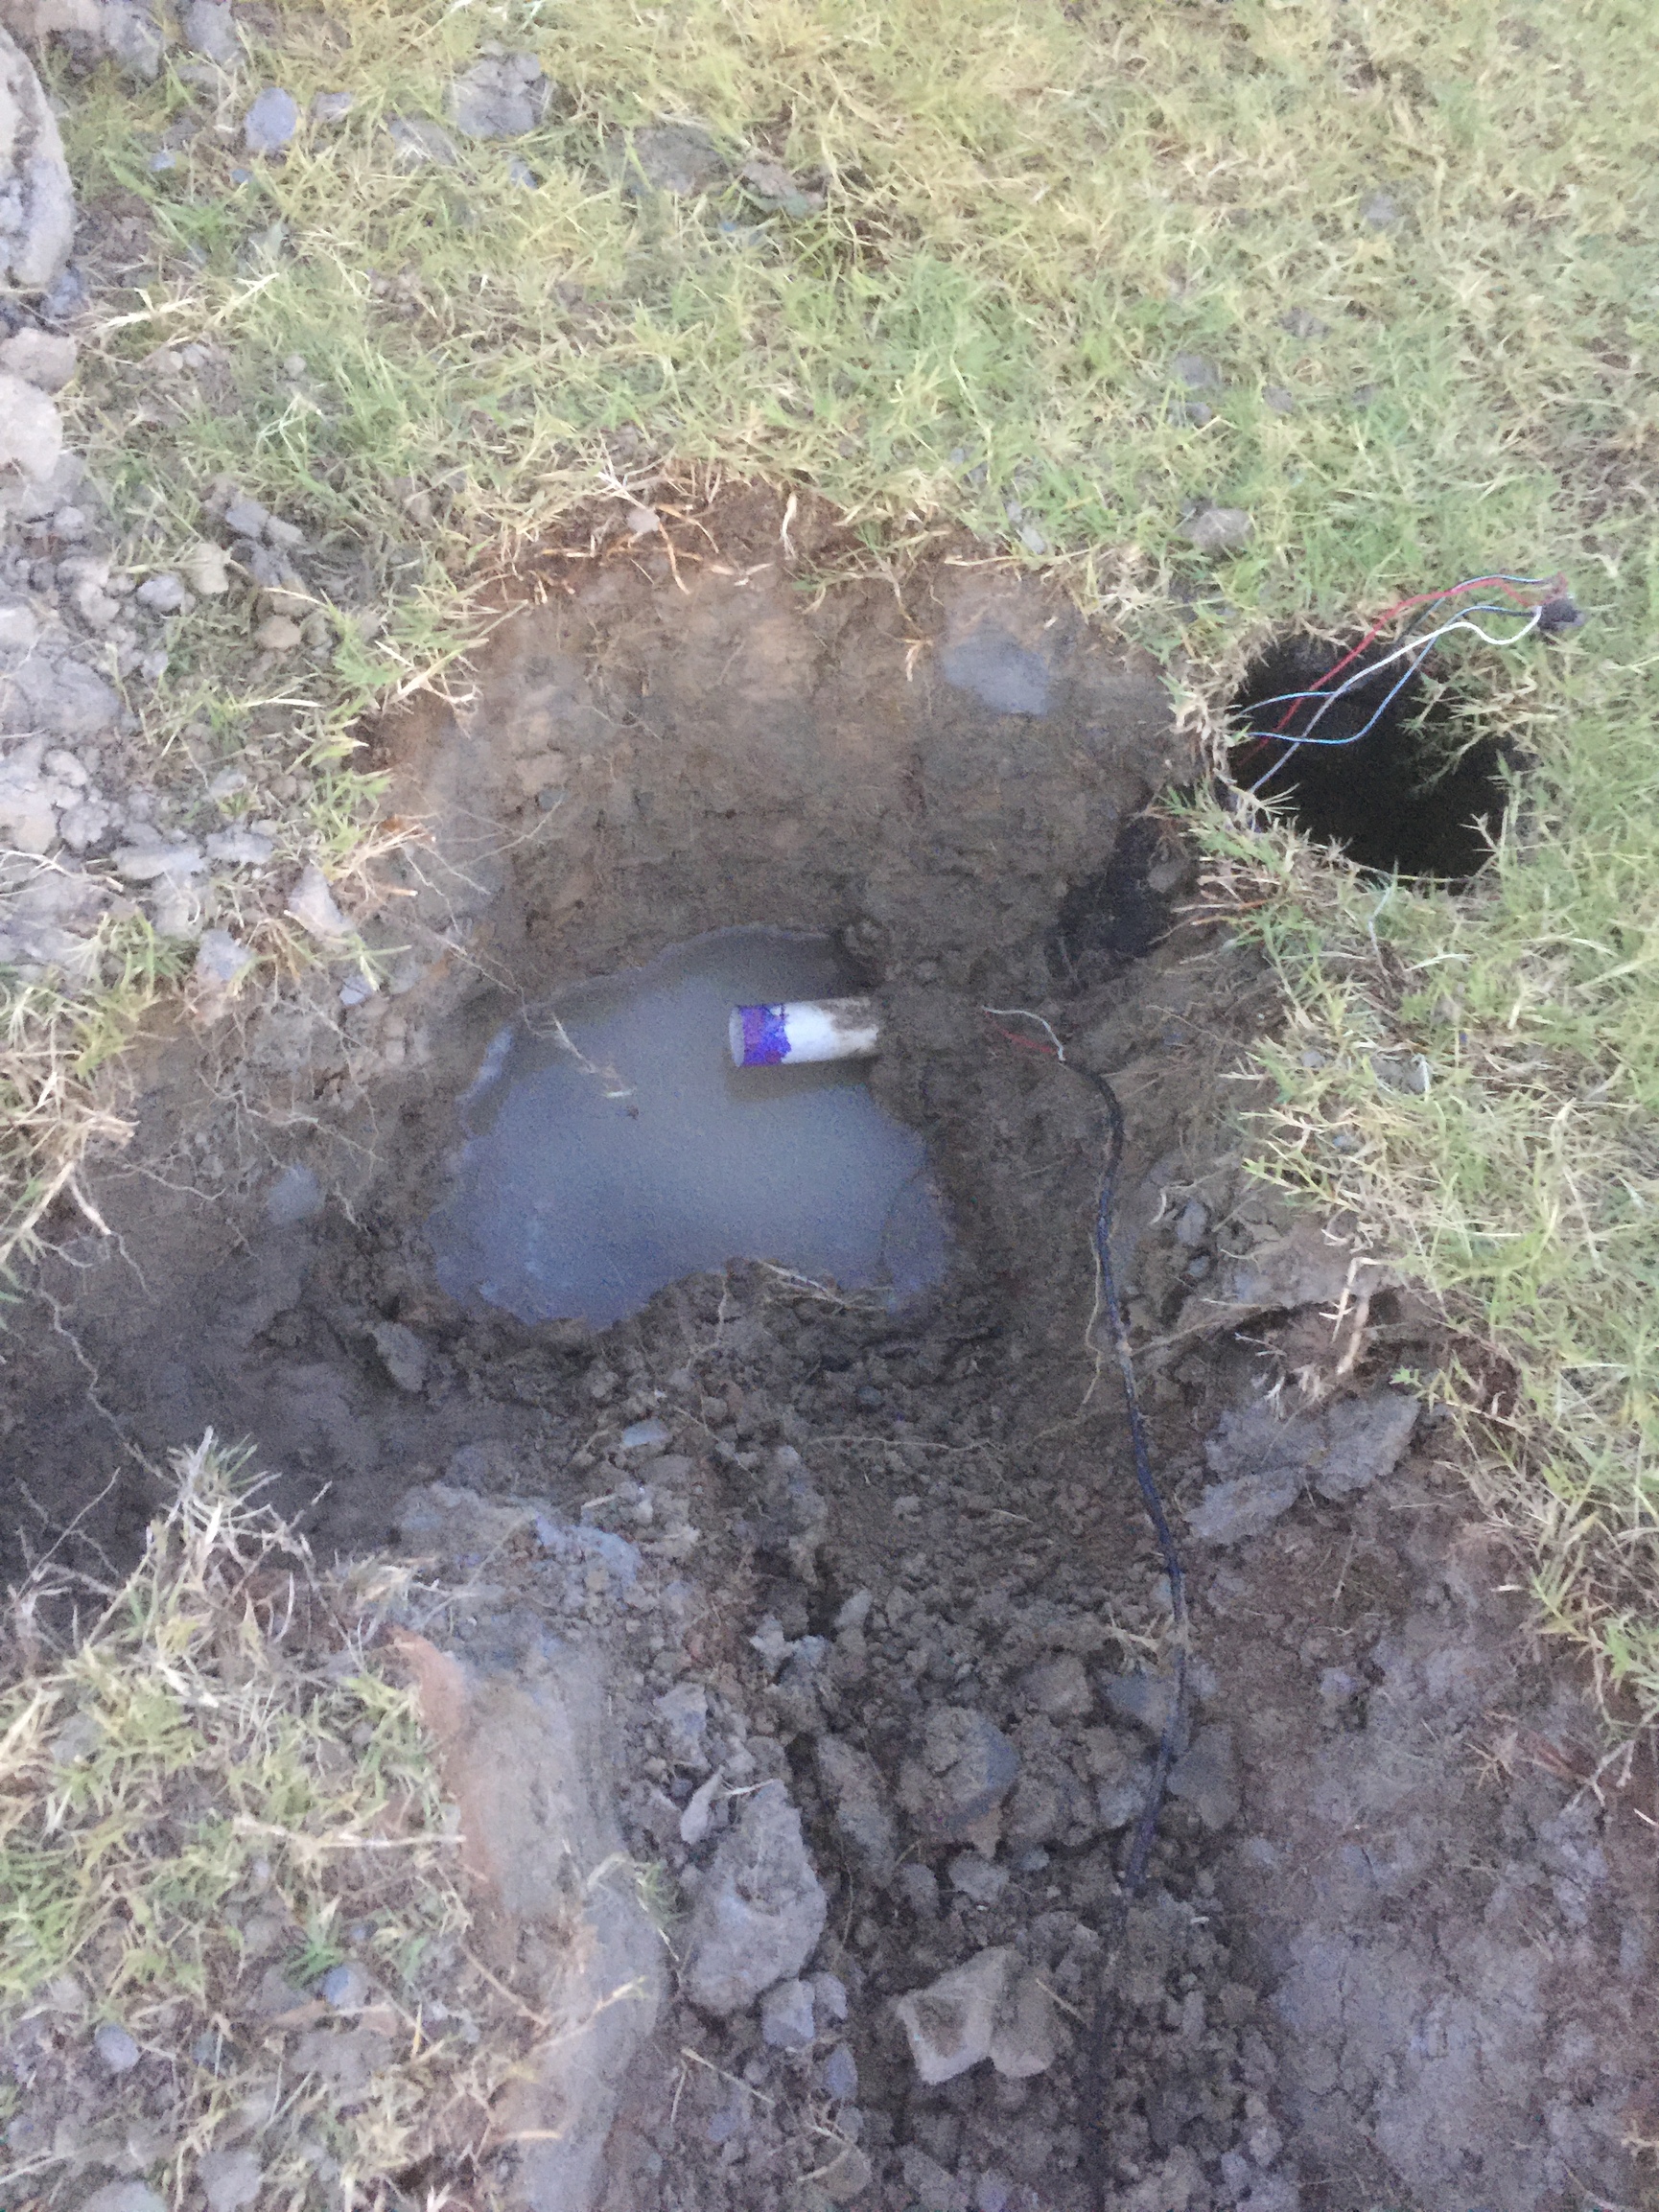
Next a picture of where I started thinking that the pipes ran in a straight line out of the main valve, not so fast… the main valve in the picture above is to the right of the picture below. The pile of dirt in the top of the picture is where I initially dug thinking the pipe would be strait out of the main valve…not so in this case, it took a hard left then right so the pipe would run with another pipe that had sprinkler heads in it, which you can see one of them in the picture.

Next I decided to replace the two 90 degree elbows with two 45 degree elbows to gain a potential 10+% improvement in pressure through the system (the engineer in me) and dug a diagonal to make that possible.

Got all my parts to install after waiting for an Amazon delivery…
Another view before cutting pipe:
(Picture is too big to upload, not that helpful but I will see if I can shrink it and upload later.)
Cutting pipe with my cutter, not a saw. Much easier than a saw but you have to be careful with thin wall and old pipe. Yes I re-used the pipe I cut out to make the new connections. I have done LOTS of PVC work at my homes over the past 30 years so I’m very comfortable with the tools, preparation and glue.
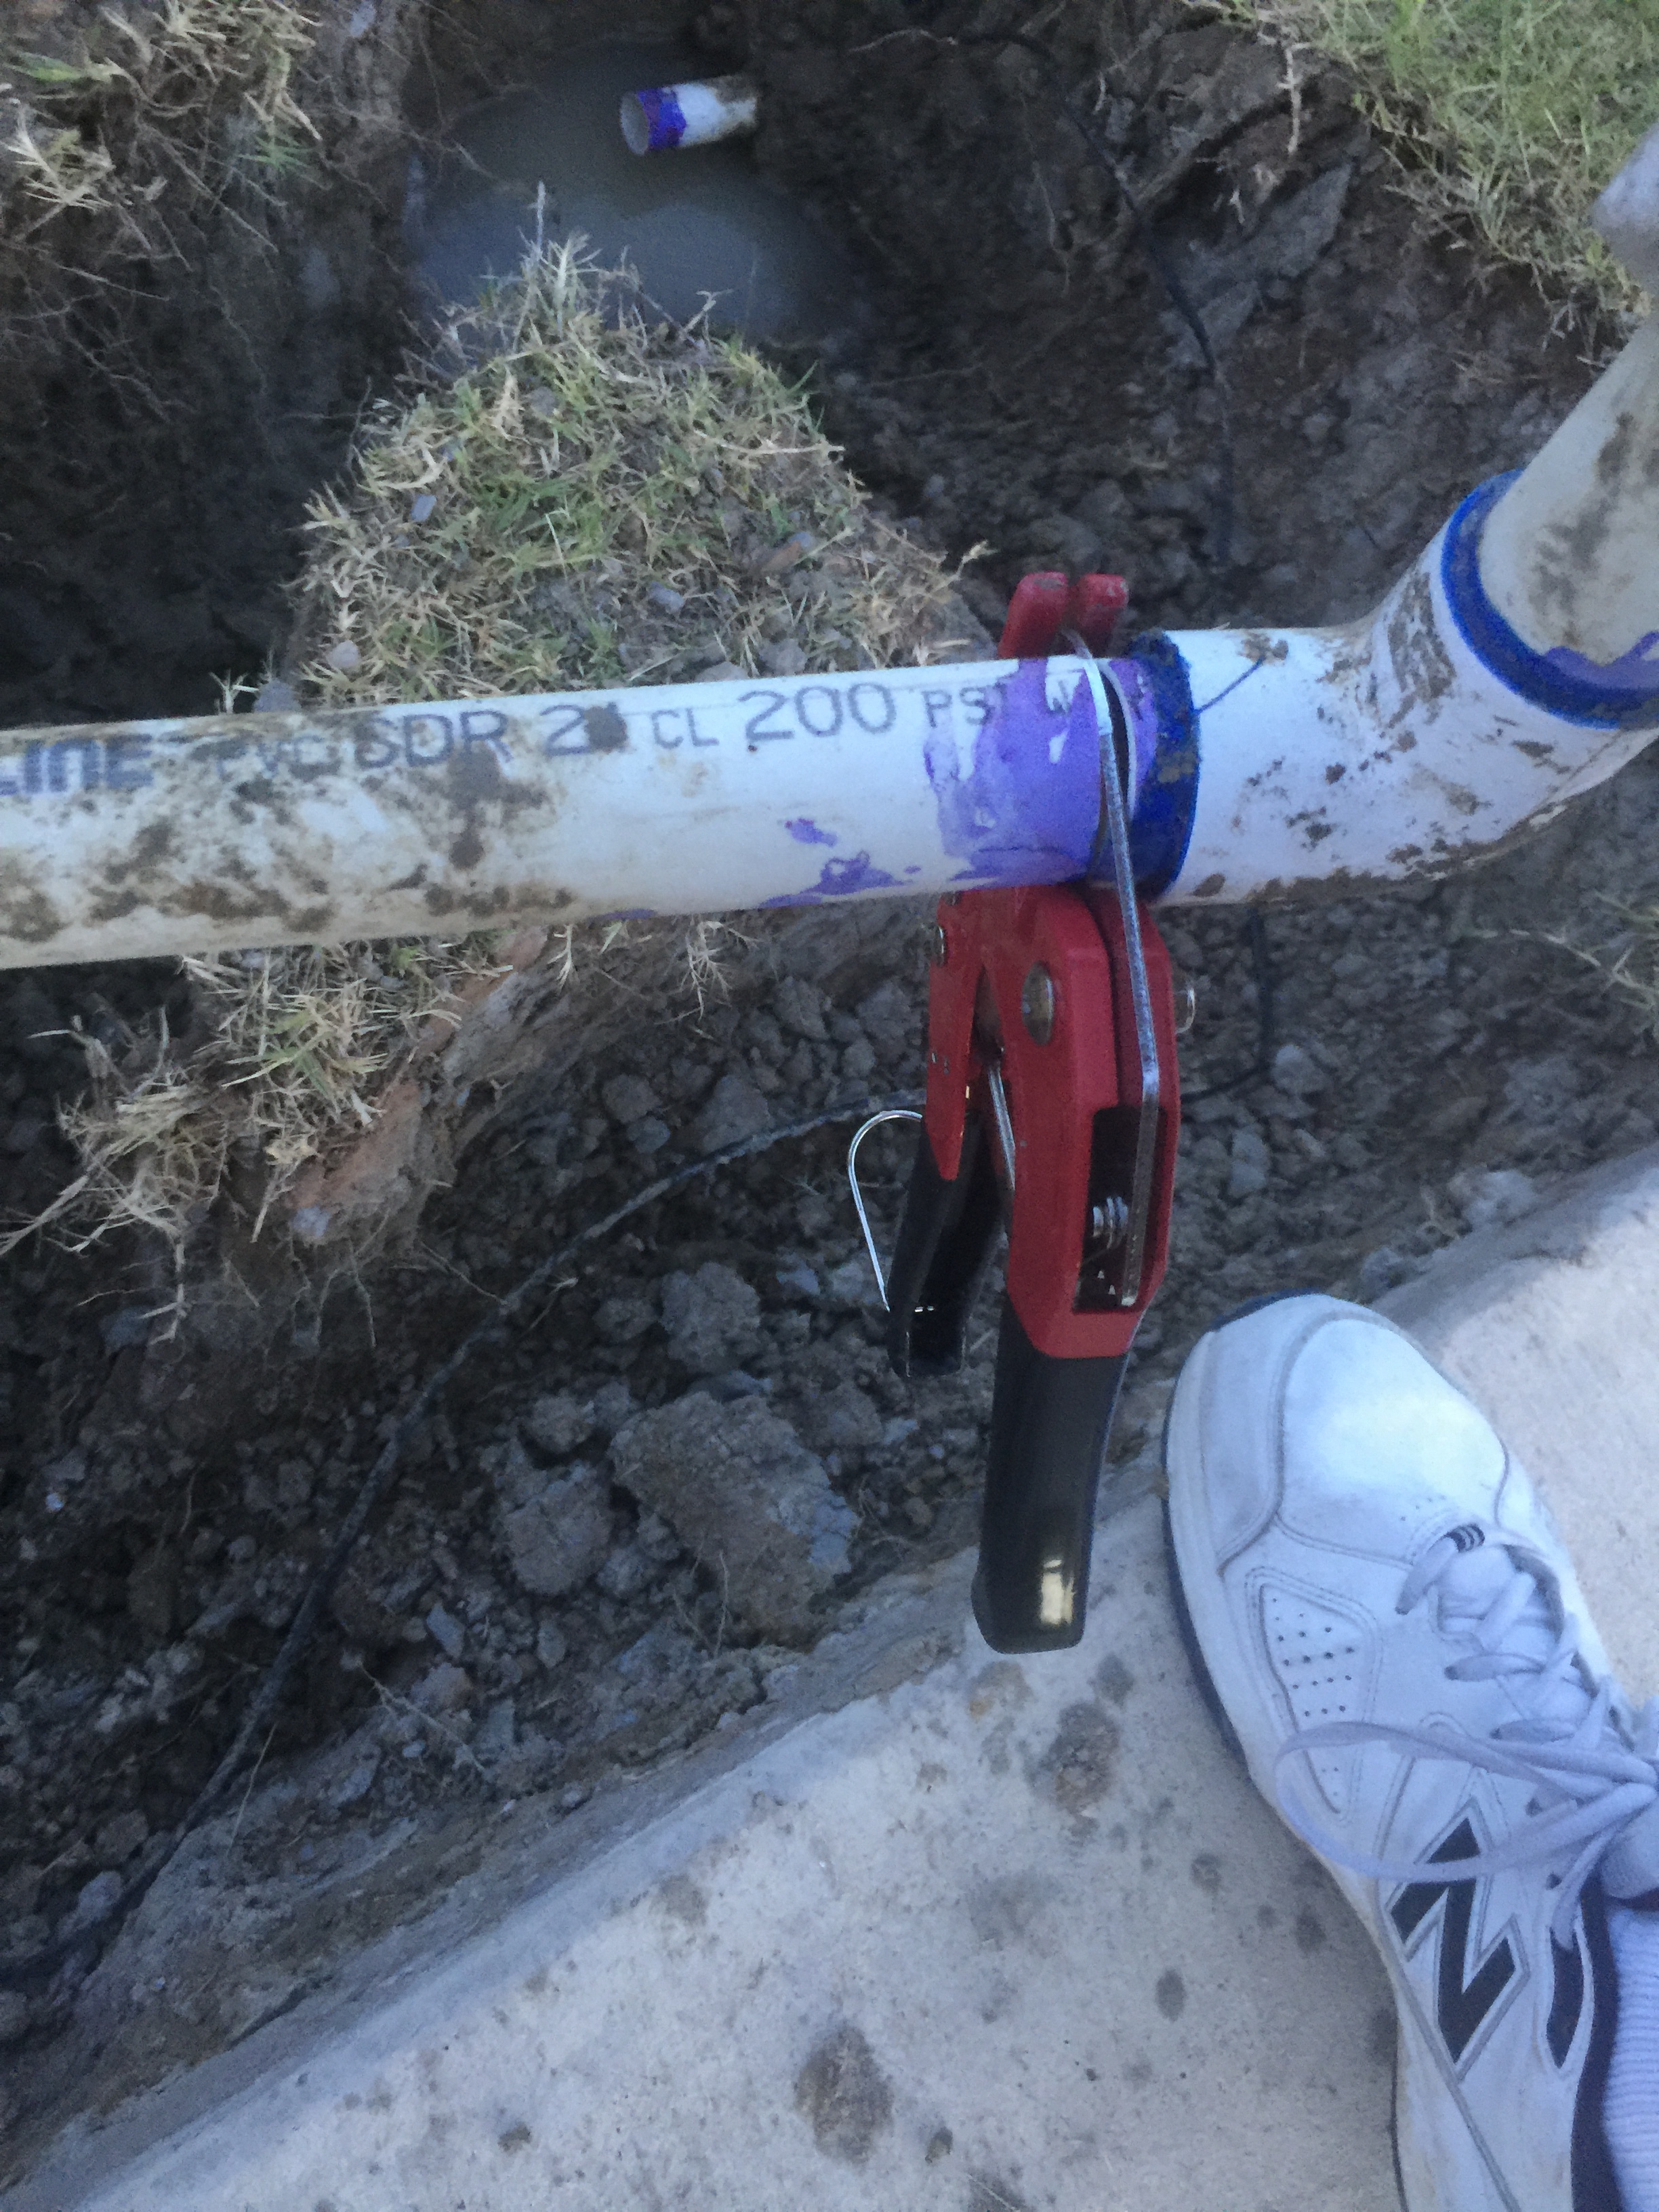
Now the ends of the two pipes. The first one is where the Rachio Flow Meter and the recommended fittings will attach. You can see the additional sprinkler pipe for the sprinkler heads and the one I had to work around. Not really a big deal as long as I didn’t cut the wrong pipe!!

The second one is where I will glue the pipe with the two 45 degree elbows to replace the two 90’s.
Now with everything installed but the box to enclose the Rachio Flow Meter.
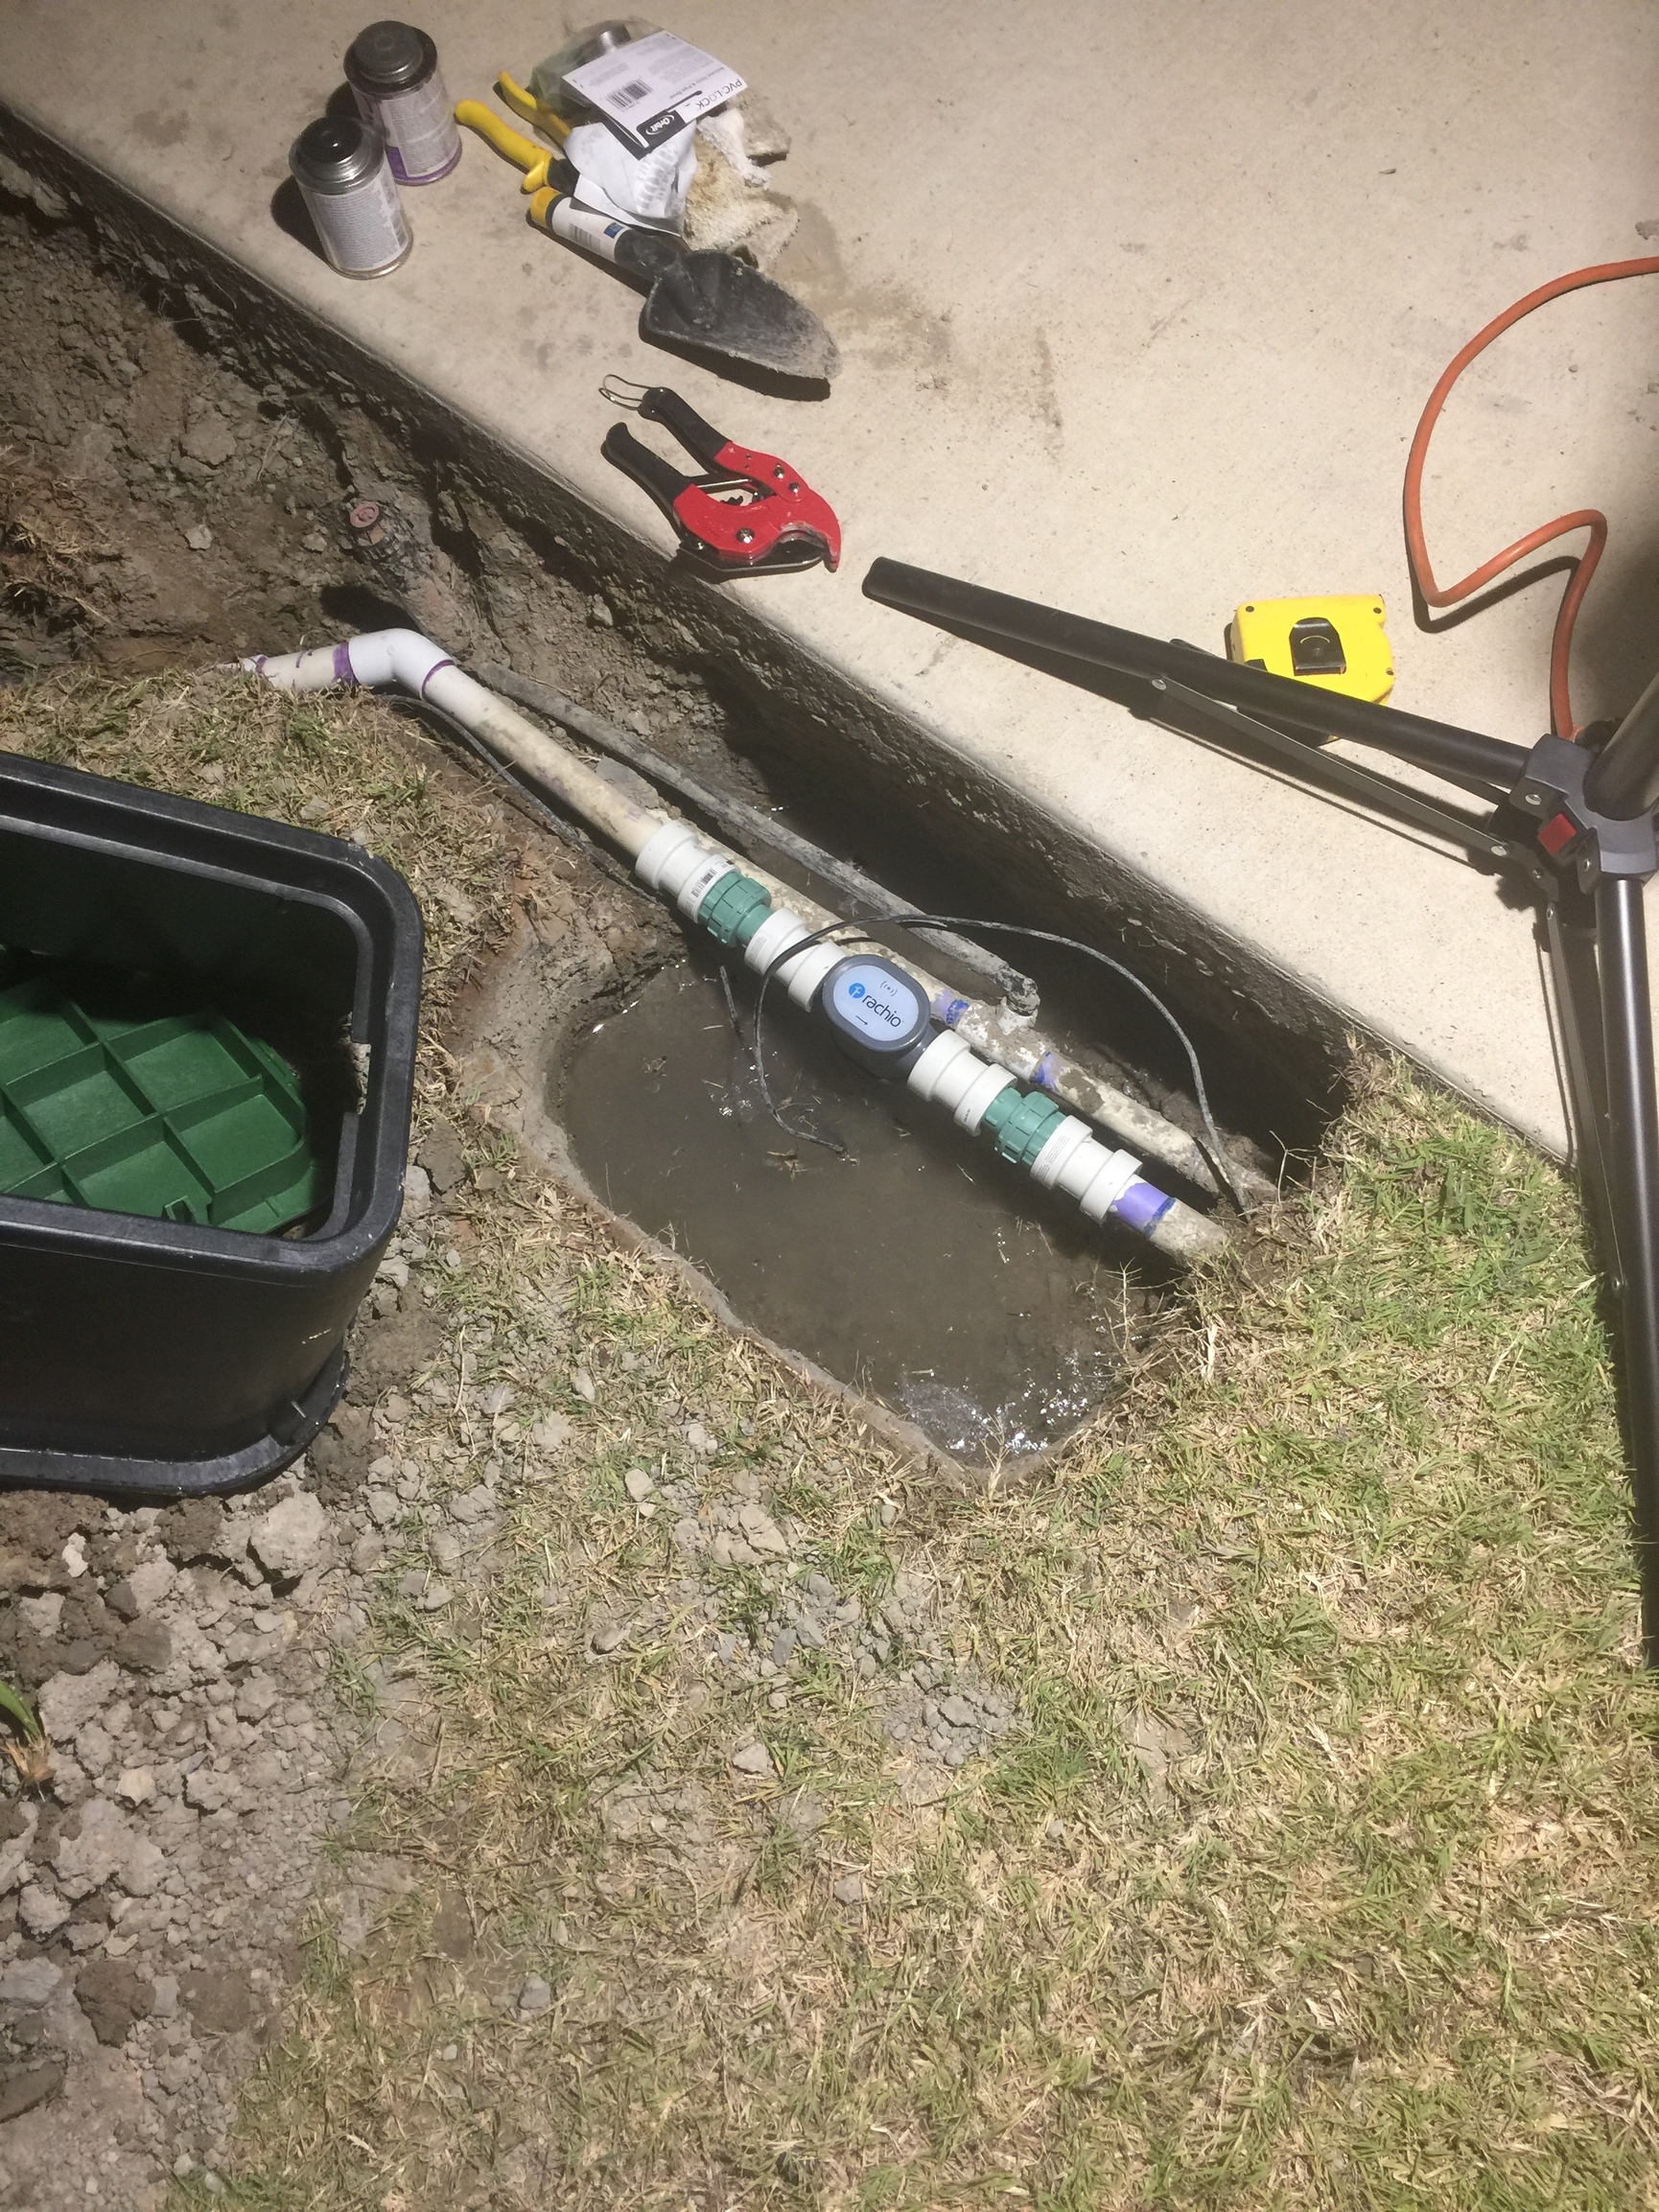
I had to cut the box pipe openings larger than the factory holes, however I failed to take a picture before I put it in the ground and covered it up with dirt. I will follow up with a view from the top of the box when I get a chance. The Flow meter is probably 60 feet from the controller with a wooden garage door between them so well within the 75 feet limit in the underground instructions. I have “Good” wireless signal according to the Rachio app with the cover on and the garage door closed. I had “Excellent” signal with the garage door closed so there is some attenuation there.
Let me know if you have questions.
5 Likes
Correction: I had “Excellent” signal with the garage door open so there is some attenuation there.
What is the purpose of the swivels? To act as a union and allow for removal at some point?
I suppose so, it made the install slick and easy, plus these are the exact instructions for underground install from Rachio. If you didn’t have these in place, it would be difficult to remove if you had to replace the unit since there is ZERO play in the pipes unless you dig them up or cut them. After looking at the pictures again, I probably should have slid the box over an inch or two to have more of the green coupler/adapter inside the box on the end from the water source. I see now I had some room on the other end to do just that. However, with heat index here in Texas over 100 degrees, I’m not highly motivated to dig it up right now. ![]()
![]()
![]() I still think it will work for the long run as-is, but not having it “perfect” always bugs me…
I still think it will work for the long run as-is, but not having it “perfect” always bugs me…
Last two photos, the inside of the box and the ground with everything covered up and time to let the grass grow back…All calibrated and ready to roll!!!
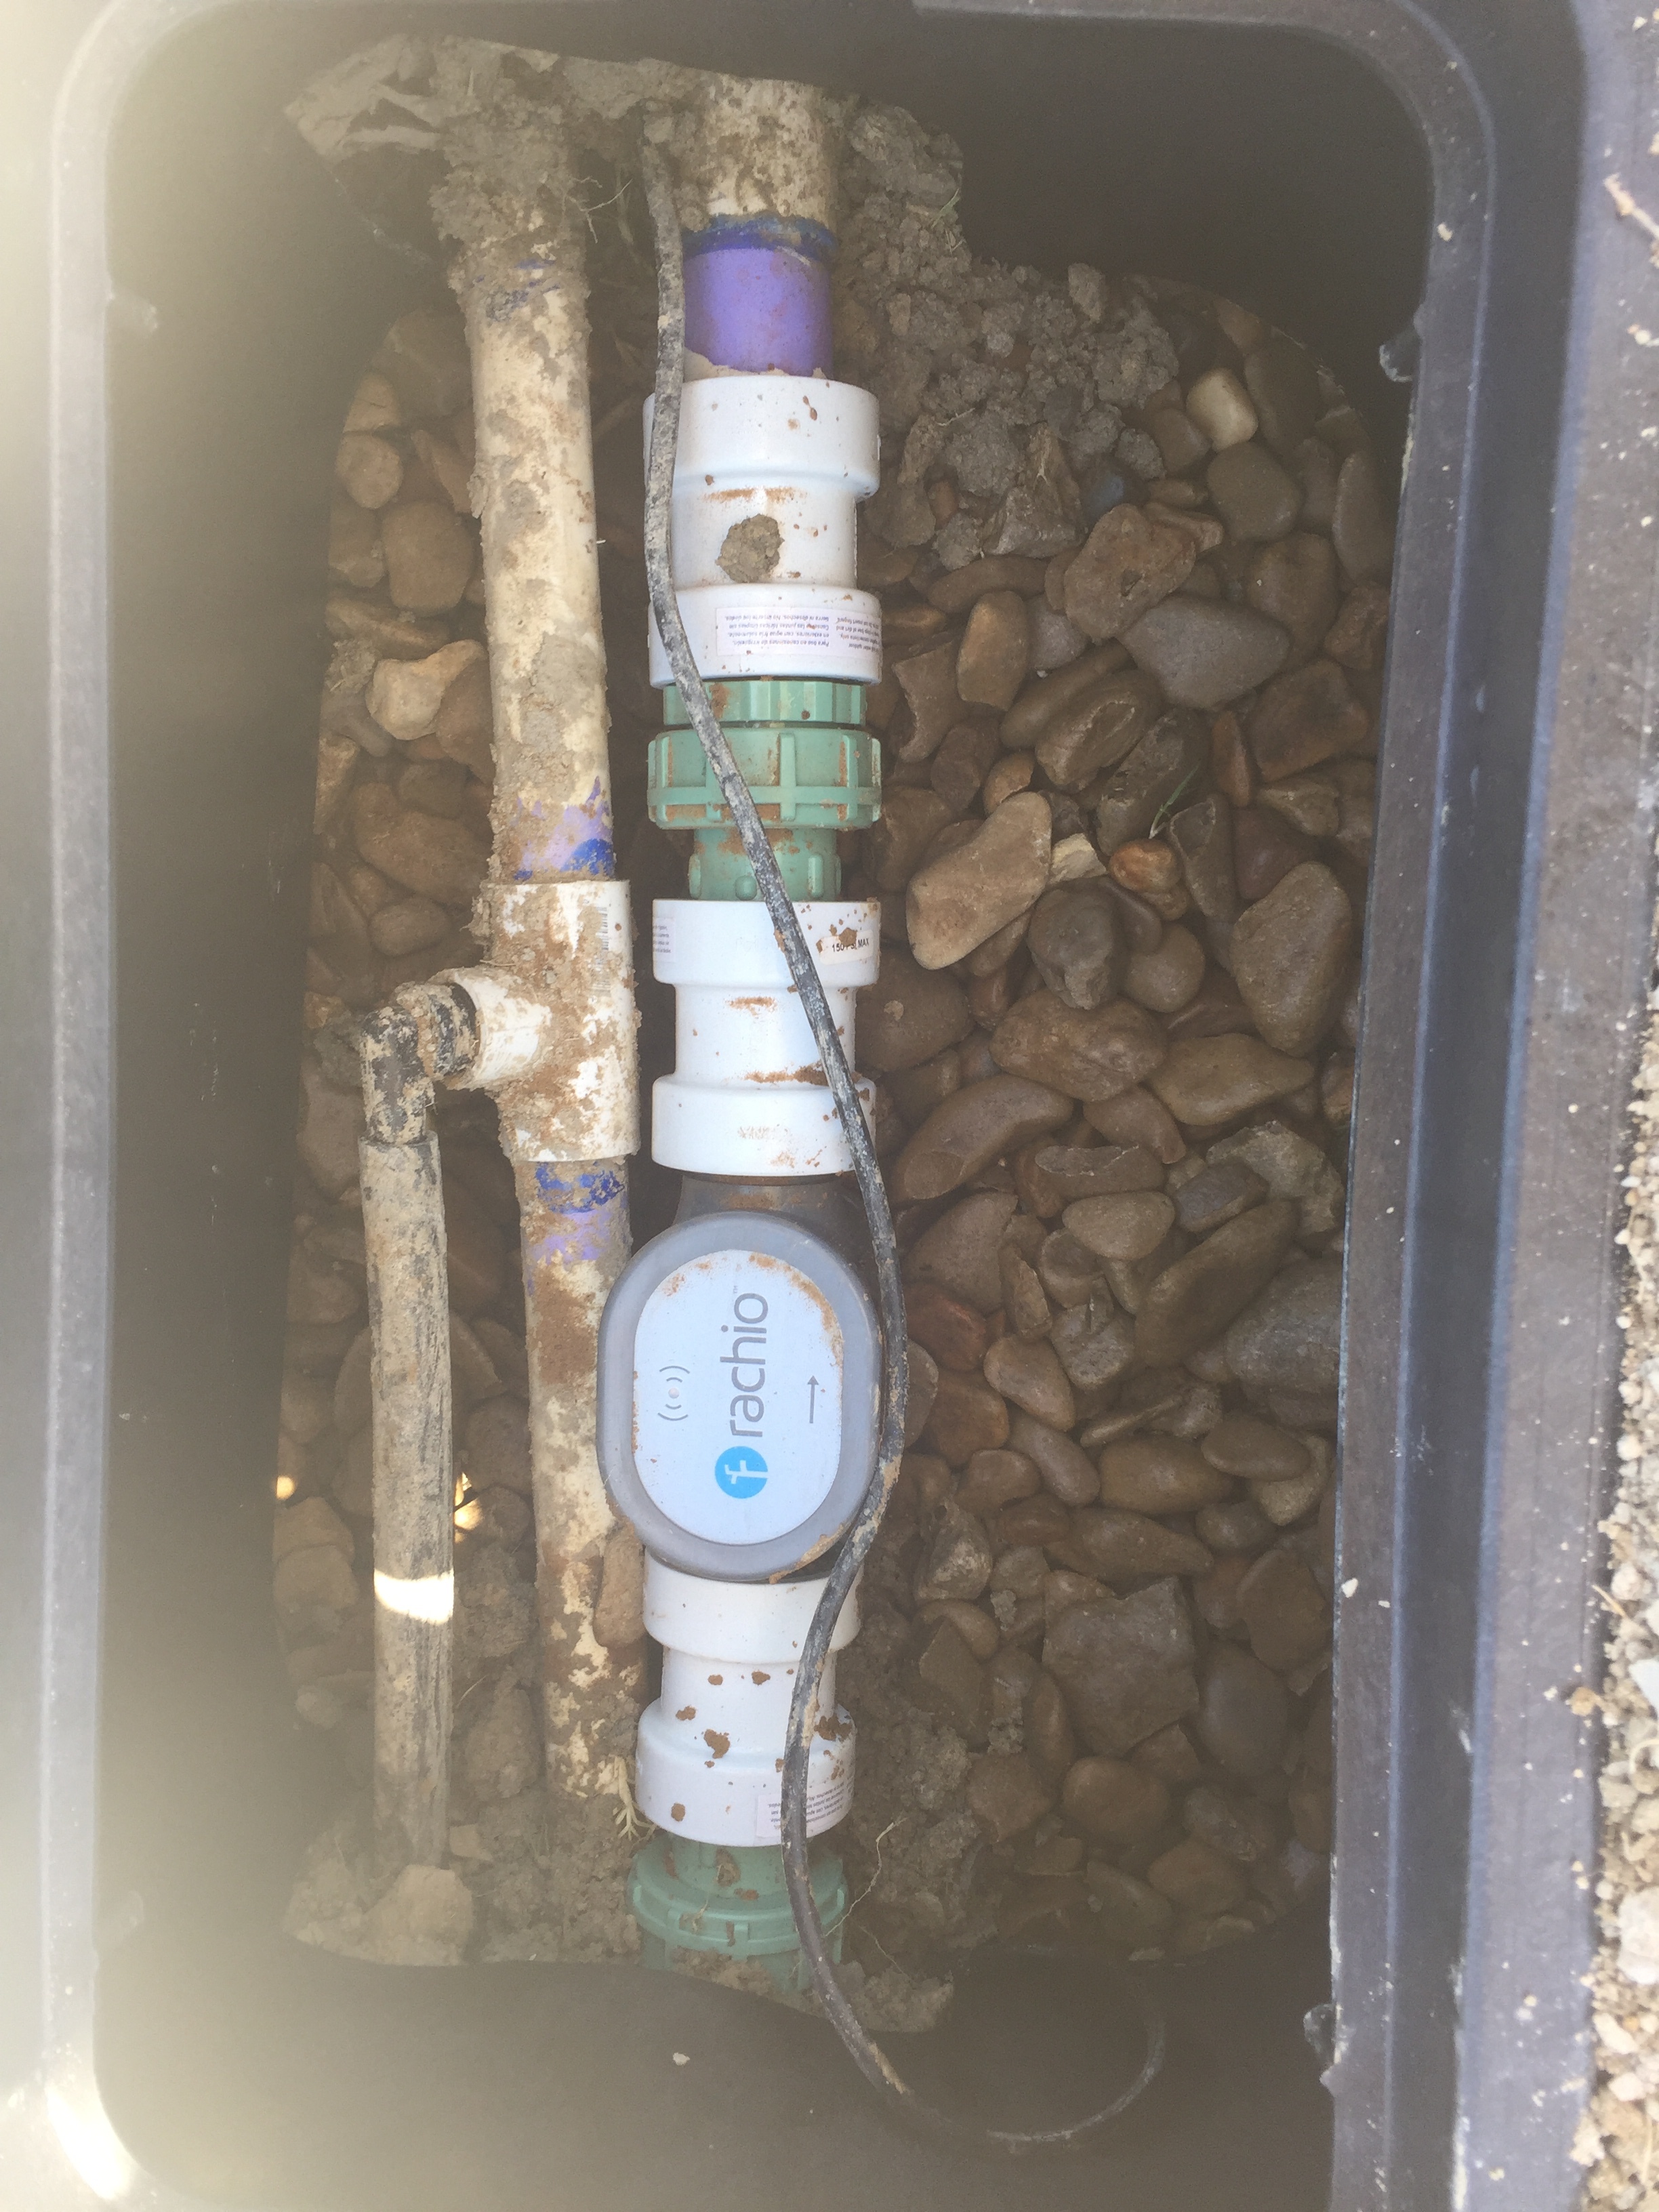

2 Likes
@kseawright Amazing details! That alone is worth some swag, will PM ya tonight
Thanks for sharing, this will be helpful for the underground community following in these footsteps.
2 Likes
I get that the Rachio instructions are trying to make it a completely glueless install for the most basic DIY’er, but if I were doing it, I’d skip the swivels and second pair of push on fittings and go with standard unions and small stubs of pipe…if removal of the sensor isn’t necessary, I’d skip the unions and go with one slipfix coupling ahead of the sensor.
Not knocking your install, and you did a textbook job based on Rachio instructions!